"Online Application Document Checklist: Photos, Scans, Signatures and File Sizes"
In this guide
- Step 1: read the requirements and write them down
- Step 2: the photo
- Step 3: the signature
- Step 4: scanned documents
- Step 5: your CV and written documents
- Step 6: name your files clearly
- Step 7: the final checklist before you press Submit
- Build an "application kit" once
- Common upload errors and what they usually mean
- Privacy when using online tools
- Timeline: when to do what
- Keeping a record after you apply
- Frequently asked questions
- In short
It is 11:40 pm and the application closes at midnight. The form has been filled in for days. Now the portal says: "Photo must be JPG, 20–50 KB." Your photo is 3.4 MB. Then: "Upload degree certificate as a single PDF under 500 KB." You have it as four phone photos. Then: "Signature: 140 × 60 pixels, under 20 KB." You do not even have a signature image yet.
Almost everyone who applies for jobs, university places, exams, scholarships, visas or government services online has lived some version of this. The form is easy; the file requirements are what cause panic. This guide gives you a complete checklist to prepare your documents properly, before the deadline, so uploading becomes the easy part.
Step 1: read the requirements and write them down
Every portal is different, and requirements change between years. Before preparing anything, open the official instructions or the upload page and make a small table of what each document must be:
| Document | Format | Size limit | Dimensions | Other rules |
|---|---|---|---|---|
| Photo | JPG | 20–50 KB | 200 × 230 px | White background, recent |
| Signature | JPG | 10–20 KB | 140 × 60 px | Black ink on white paper |
| CNIC / ID copy | under 1 MB | — | Both sides on one page | |
| Degree / certificates | under 500 KB each | — | Clear, all pages | |
| CV | under 2 MB | — | — |
The numbers above are only examples. Use the exact numbers from your portal, because a file that is 51 KB when the limit is 50 KB will be rejected, however good it looks.
Pay special attention to:
- The file format: JPG, PNG or PDF. "JPEG" and "JPG" are the same thing.
- Minimum and maximum sizes: some portals reject files that are too small, not only too big.
- Dimensions in pixels or centimetres.
- Rules about backgrounds, colours, glasses, headwear and how recent a photo must be.
- Whether several pages must be combined into one file.
Step 2: the photo
The photo is the most frequently rejected upload. Check the official rules, then:
- Take a new photo against a plain, light background, facing the camera, with even light on your face and no shadows behind you. Daylight from a window in front of you works well.
- Make it the right shape and size. Passport Photo Maker crops your photo to standard passport and visa sizes for many countries; zoom and move the photo so your head fills the frame as the rules require. If your background is not plain, Remove Background can help before cropping.
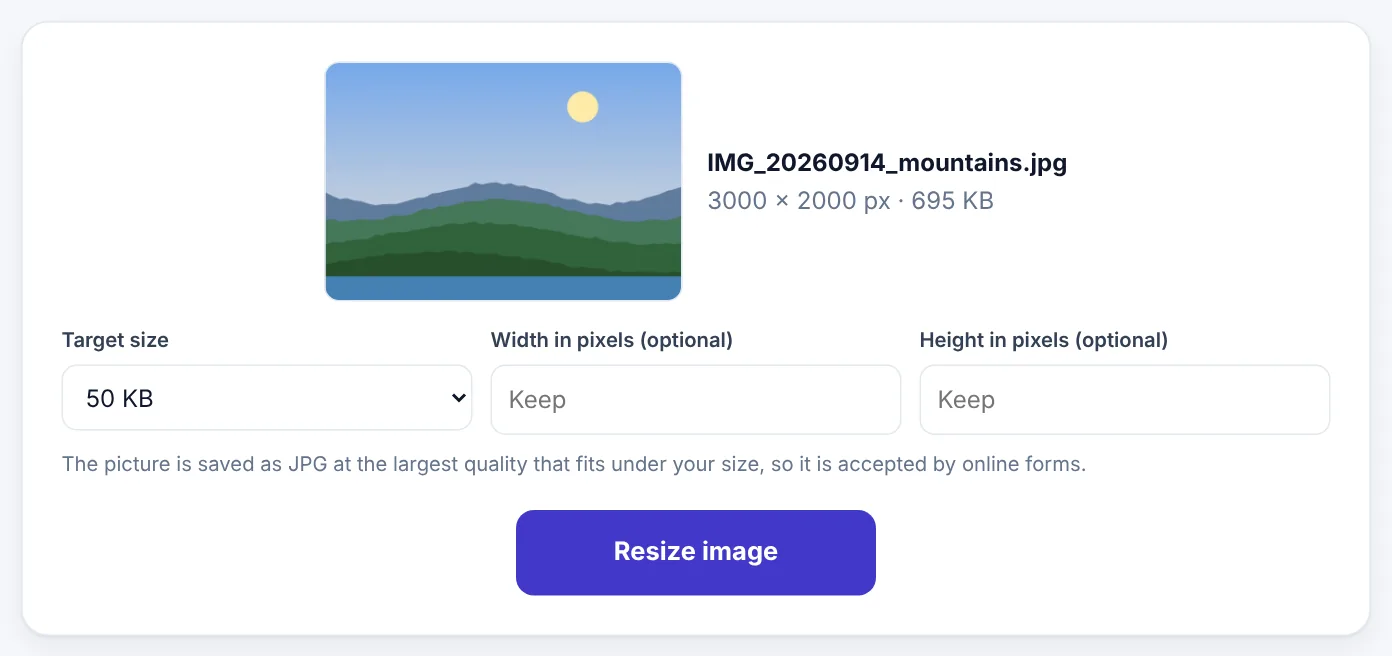
- Meet the file size. Resize Image to KB lets you enter the exact width and height in pixels and a target size in KB, and finds the best quality that fits.
See our detailed guides on making a passport photo at home and resizing a photo to 20 KB, 50 KB or 100 KB.
Try Resize Image to KBFree, no sign-up, and your file never leaves your device.Open tool →

Step 3: the signature
Many forms ask for a scanned signature image with strict rules.
- Sign on plain white paper with a black or dark blue pen, a little larger than usual.
- Photograph it in daylight, phone flat above the paper.
- Create a clean image with Signature Maker, which removes the paper background, and download the JPG (white background) version for forms.
- Resize it to the required pixels and KB with Resize Image to KB.
Our guide How to create a handwritten signature image online covers this in detail.
Step 4: scanned documents
Certificates, transcripts, ID cards, letters and bills usually need to be uploaded as PDFs.
Scan them properly
You do not need a scanner. Scan to PDF turns phone photos into a clean PDF: it finds the page edges, straightens and crops each page, and can make the page white and crisp like a real scan.
Tips for good phone scans:
- Place the document on a dark, plain surface so the edges are easy to find.
- Use daylight, without your shadow on the page.
- Hold the phone directly above the page.
- Make sure every corner and the whole text is visible, including stamps and signatures.
- For ID cards, photograph both sides, and combine them on one page if the portal asks.
Combine pages into one file
If a portal wants one PDF per document, combine the pages: put several photos into one PDF with JPG to PDF, or join existing PDFs with Merge PDF. Check the page order before saving.
Meet the size limit
Scans are often too large for portals. Compress PDF reduces them, usually without visible loss. If a document is still too large, scan it in black and white or greyscale, which can make it much smaller; see How to print a PDF in black and white.
Step 5: your CV and written documents
- Always upload a PDF unless the portal asks for Word. A PDF looks the same everywhere and cannot be accidentally changed.
- Check the layout after converting: no text cut off, no blank pages, fonts look right. Word to PDF converts Word files in your browser.
- Remove hidden details such as old titles and a template author's name with Remove PDF Metadata.
- Keep it within the page limit, if one is given.
If you are writing a CV or cover letter from scratch, see our guides on making an ATS-friendly resume and writing a cover letter.
Step 6: name your files clearly
Portals sometimes reject file names with spaces or special characters, and reviewers who download dozens of applications appreciate clear names. A simple pattern works everywhere:
Ayesha-Khan-Photo.jpgAyesha-Khan-Signature.jpgAyesha-Khan-CNIC.pdfAyesha-Khan-BSc-Degree.pdfAyesha-Khan-CV.pdf
Use letters, numbers and hyphens. Avoid #, &, /, accents, emojis and very long names.
Step 7: the final checklist before you press Submit
- [ ] Every file is the right format (JPG, PNG or PDF as asked).
- [ ] Every file is within the size limits, both minimum and maximum.
- [ ] Photos and signatures have the right pixel dimensions.
- [ ] The photo follows the background and appearance rules.
- [ ] Scans are clear, straight and complete, with every corner, stamp and signature visible.
- [ ] Multi-page documents are combined in the right order.
- [ ] File names are clear and simple.
- [ ] Your name, date of birth and ID number match exactly across the form and every document.
- [ ] You have opened every file after preparing it, to check it is the right one and not blank.
- [ ] You have saved copies of everything in one folder, including the submitted form or confirmation page.
Build an "application kit" once
If you apply for several things in a year, prepare a folder once and reuse it:
- A high-quality original photo, plus ready-made copies at common sizes.
- A transparent PNG and a white-background JPG of your signature.
- Scanned PDFs of your ID, certificates, transcripts and experience letters, at good quality.
- Compressed copies of each scan for portals with small limits.
- Your CV as both an editable file and a PDF.
With this kit, a new application takes minutes rather than an evening of scanning and resizing. Keep the folder private: it contains exactly the documents that identity thieves look for. Store it on your own device or a private cloud folder, never in shared folders or group chats, and delete copies from shared or public computers after use.
Common upload errors and what they usually mean
| Error message | Usual cause | Fix |
|---|---|---|
| "Invalid file type" | Wrong format, or a PNG renamed to .jpg |
Convert properly with PNG to JPG or JPG to PDF |
| "File size exceeds limit" | File too large | Compress, or resize to the exact KB target |
| "File too small" | Below the minimum KB | Increase the target size or quality |
| "Invalid dimensions" | Wrong width or height in pixels | Enter the exact pixel size in Resize Image to KB |
| "Upload failed" with no reason | Weak connection, special characters in the file name, or an overloaded portal near the deadline | Rename simply, try again, and avoid the last hours before a deadline |
| Blank or black preview | Unsupported image type such as HEIC from iPhone, or a damaged file | Convert with HEIC to JPG and upload again |
Privacy when using online tools
You are handling some of your most sensitive documents: ID cards, certificates, signatures. Use tools that process files on your own device wherever possible. The tools linked in this guide work in your browser, so your documents are not uploaded to our servers. Avoid sending ID scans through unknown websites, group chats or email to people who do not need them.
Timeline: when to do what
Leaving everything to the last day is the main cause of upload problems. A simple plan:
| When | What to do |
|---|---|
| As soon as you decide to apply | Read the instructions and make your requirements table |
| One to two weeks before | Take the photo, create the signature, scan all documents |
| One week before | Prepare every file to the exact format and size; fill in the form |
| Three to four days before | Upload and submit; keep the confirmation |
| Deadline day | Only for emergencies; portals are often slow or overloaded |
Some documents take time to obtain, such as attested copies, character certificates or letters from employers. Check what you need early so you are not waiting for paperwork in the final week.
Keeping a record after you apply
After submitting, save:
- The confirmation page or email, as a PDF or screenshot.
- The application or roll number, which you will need to check results or make changes.
- A copy of every uploaded file, exactly as submitted.
- The fee payment receipt, if there was a fee.
Put them in the same folder as your application kit, in a sub-folder named after the application and year. If anything goes wrong later, you can prove what you submitted and when.
Frequently asked questions
What is the difference between KB and MB?
1 MB is about 1,000 KB (strictly 1,024). A 2 MB photo is roughly 2,000 KB, far above a 50 KB limit.
My photo looks fine but the portal rejects it. Why?
Usually the file size, pixel dimensions or format do not exactly match. Check each number in the instructions and prepare the file to match them precisely.
Can I upload phone photos instead of scans?
Many portals accept them if they are clear, but a cleaned-up PDF from Scan to PDF looks more professional and is easier to read.
My iPhone photos will not upload. What should I do?
iPhones often save photos as HEIC, which many portals do not accept. Convert them to JPG first.
Should I upload colour or black-and-white scans?
Follow the instructions. If none are given, colour is safest for photos, stamps and certificates; greyscale is fine for plain text documents and makes smaller files.
Do I need to attest or certify scans before uploading?
Some organisations ask for attested or certified copies, others accept plain scans. Follow the instructions for each application; if attested copies are required, scan the attested document, stamps and signatures included.
Can I reuse the same photo for different applications?
Often yes, if it meets each portal's rules and is recent enough. Keep a high-quality original and make a separate copy at each required size.
In short
Read the requirements first and write them down. Prepare your photo, signature and scans to the exact format, dimensions and KB limits, combine pages where needed, name files simply, and open every file before you upload it. Build a private application kit once, and future deadlines become a ten-minute job instead of a midnight emergency.
Tools used in this guide
 Passport Photo Maker
 Scan to PDF
 Compress PDF
Keep reading
 Online FormsHow to Compress a PDF to 50 KB, 100 KB, 200 KB or 500 KB
Online forms say "maximum 100 KB" or "PDF under 500 KB". Here is how to get your PDF under any limit – from 50 KB to 1 MB – while keeping it readable, on a phone or computer.
4 min read PDF GuidesHow to Change the Background Color of a PDF (Free, Online)
Change a white PDF to cream, mint, light blue or any colour in under a minute – on your phone or computer, without Adobe Acrobat and without uploading the file.
4 min read Ebooks & Writing"EPUB vs PDF: Which E-book Format Should You Use?"
The real differences between EPUB and PDF for e-books, study material and self-published books, which one readers prefer on phones and e-readers, and how to convert between them.
10 min read